

Key takeaways
- The best marble peel and stick backsplash for most rental kitchens is a removable gel tile with a low-gloss Carrara-style pattern, while vinyl is the better choice when you need the lowest cost, easiest trimming, or a backsplash that will…
The best marble peel and stick backsplash for most rental kitchens is a removable gel tile with a low-gloss Carrara-style pattern, while vinyl is the better choice when you need the lowest cost, easiest trimming, or a backsplash that will be replaced after a short lease.
That distinction matters because “peel and stick marble” covers two very different products. Thin printed vinyl sheets are light, inexpensive, and simple to cut, but they can look flat and may lift sooner around a sink. Thicker gel tiles have a raised surface, more convincing veining, and better ability to hide a slightly imperfect wall, but they cost more and demand careful alignment.
Our top picks


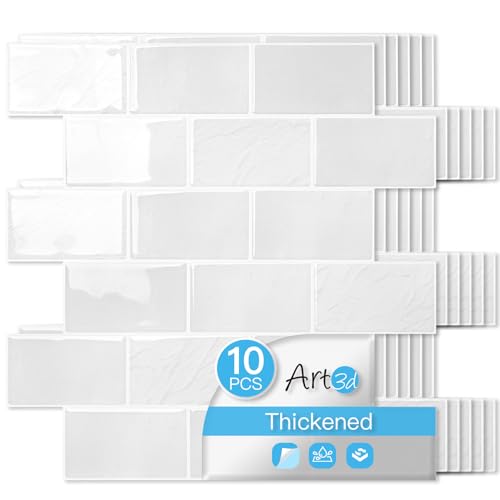
As an Amazon Associate we earn from qualifying purchases at no extra cost to you. Ratings are shown as listed on Amazon.
Best marble peel and stick backsplash options by situation
| Kitchen situation | Better choice | Typical material and format | Expected market range | Why it fits |
|---|---|---|---|---|
| Lowest-cost rental refresh | Printed vinyl sheet | PVC or vinyl, approximately 0.01–0.03 inches thick; sheets around 12 x 24 inches | $1.50–$4 per square foot | Lightweight, quick to cut, and inexpensive to replace |
| Most realistic marble appearance | Raised gel tile | Multi-layer gel or PVC tile, approximately 0.08–0.14 inches thick; commonly 10.5 x 10.5 inches | $6–$15 per square foot | Raised edges and shadows make the pattern less like wallpaper |
| Uneven or lightly textured wall | Flexible raised gel tile | Embossed surface with pressure-sensitive adhesive | $7–$16 per square foot | More forgiving visually than a paper-thin film |
| Area directly behind an electric cooktop | Vinyl or gel tile only if the maker permits it | Peel-and-stick surface with a separate heat shield where required | $2–$16 per square foot, plus any shield | Allows a removable finish without assuming unlimited heat tolerance |
Vinyl versus gel tile: the head-to-head
Adhesion
Adhesion depends more on the wall than on the marble print. Clean, smooth, dry, painted drywall usually gives the best result. Grease, silicone residue, chalky paint, dust, and textured surfaces are common reasons for early lifting.
Vinyl sheets have less mass, so their adhesive has less to hold. That helps on a sound wall, but a thin edge can curl if it is repeatedly splashed or scrubbed. Gel tiles weigh more, yet their thicker construction often creates a more substantial bond and better masks small dips. They are not a solution for crumbling paint, damp drywall, loose wallpaper, or heavily textured walls.
For a rental, apply a small sample in an inconspicuous place first. Leave it for several days, then remove it slowly. A product marketed as removable can still pull weak paint or leave adhesive if the wall coating is old, soft, or poorly bonded.
Heat resistance
Peel-and-stick backsplash materials are decorative wall coverings, not fireproof panels. Many are suitable for normal kitchen splashes and moderate warmth, but the permitted temperature and clearance vary by product. A gas flame, toaster oven exhaust, air fryer discharge, or pan placed close to the wall can exceed the adhesive’s working range.
Do not install vinyl or gel tile immediately behind an exposed gas burner unless the manufacturer specifically approves that location and required clearance. Where heat is a concern, use a non-combustible metal or glass cooking shield in the high-temperature zone, or stop the peel-and-stick material at a safe boundary. An electric cooktop still produces concentrated heat, so it is not automatically safe.
In ordinary use, the first heat-related failure is usually edge lifting or softening adhesive, not the marble image suddenly disappearing. Keep appliances from venting directly at the backsplash, and never rely on a general “heat resistant” label without checking the installation instructions.
Realistic marble appearance
The most convincing designs have irregular gray veining, several related background tones, and enough variation that neighboring pieces do not create a repeating pattern. A very glossy white surface can resemble plastic, especially under overhead LEDs. A low-gloss or lightly embossed finish generally looks more like honed stone.
Look closely at corners and seams. Sheet vinyl can look surprisingly good across a broad uninterrupted wall, but a badly matched seam makes the pattern obvious. Gel tiles often hide seams better because their beveled or raised edges create a grout-like transition. They can also look less realistic if every tile has identical printed veining.
Our practical decision matrix
| Your priority | Choose | Avoid | Reason |
|---|---|---|---|
| Lease under one year | Thin vinyl | Expensive embossed tile | Lower replacement cost if removal or redecorating is required |
| First DIY project | Small gel tiles with repositionable backing | Large sheets on a highly visible wall | Small pieces are easier to align and correct |
| Frequent cooking and daily wiping | Thicker tile with sealed edges | Unsealed paper-like film | Better resistance to repeated cleaning and splashes |
| Very small backsplash area | Higher-quality gel tile | Lowest-cost sheet solely to save a few dollars | A small area makes texture and seams especially noticeable |
| Strictly temporary cosmetic change | Removable vinyl | Permanent construction adhesive | Reduces the risk of turning a rental upgrade into a wall repair |
How much material do you need?
Measure the backsplash as width multiplied by height, then add 10% for trimming and pattern matching. For example, a 9-foot-wide backsplash that is 18 inches high covers:
9 × 1.5 = 13.5 square feet.
Adding 10% produces 14.85 square feet, so buy at least 15 square feet. If the wall has outlets, corners, or a diagonal termination, 15% is safer. A common 10.5 x 10.5-inch tile covers about 0.766 square feet, so 15 square feet requires roughly 20 tiles. Packaging may sell tiles in multi-packs, making the next full pack necessary.
Do not estimate from cabinet width alone. Include exposed strips beside cabinets, behind a range, and around open shelving. Keep one unopened pack if possible until the installation is complete; color and print batches can vary.
Installation details that determine durability
- Inspect the wall. Repair loose paint, fill deep holes, and let patching compound cure fully. Peel-and-stick material follows the wall profile rather than correcting it.
- Degrease thoroughly. Wash with a suitable degreaser, rinse if required, and allow the surface to dry completely. Do not apply over fresh paint until the paint has cured according to its label.
- Make a dry layout. Center the pattern on the most visible section and decide where cut pieces will end. Avoid placing narrow slivers beside a corner.
- Mark a level reference. Countertops are not always level. A level line prevents small errors from accumulating across the wall.
- Apply gradually. Peel back only part of the liner, press from the center outward, and use a soft squeegee or clean cloth. Do not stretch vinyl, because it can shrink back and open a seam.
- Roll the edges. Spend extra time at corners, around outlets, and along the counter joint. These areas experience the most lifting and moisture.
- Seal only where permitted. A narrow bead of compatible kitchen sealant at a vulnerable counter joint may help, but sealing every edge can make removal more difficult and may conflict with the manufacturer’s instructions.
Ownership realities: what wears first
The first visible wear is normally found at the bottom edge behind the sink, around a frequently used outlet, or beside a cooking appliance. Steam, water droplets, abrasive cleaners, and repeated contact with cookware all attack edges before the center of a panel.
Clean with a soft damp cloth and mild dish soap. Avoid scouring pads, bleach-heavy products, acetone, abrasive powders, and prolonged soaking. Dry the lower edge after wiping. If a corner begins to lift, do not simply press dirt underneath it and expect the bond to recover. Clean and dry the area, then follow the maker’s repair guidance; replacing one tile or panel is often more reliable than repeatedly gluing the same edge.
When removing a rental backsplash, warm the surface gently with a hair dryer on a low setting and pull slowly, keeping the strip close and parallel to the wall. Stop if paint begins to come away. Heat can make adhesive easier to release, but excessive heat can soften the finish or damage paint.
Final recommendation
Choose a low-gloss raised gel tile when realistic marble, seam concealment, and everyday durability matter most. Choose thin vinyl when the project is temporary, the area is large, or cutting around outlets is the main challenge. In either case, the best marble peel and stick backsplash is the one whose installation location falls within the maker’s heat limits and whose adhesive is matched to a clean, smooth, fully cured wall.



Write Your Review
No reviews yet. Be the first to share your experience!