

Key takeaways
- For the broadest range of studio sources, choose a quiet solid-state preamp with useful filters and enough gain. Choose an API-style design when punch and presence matter, a Neve 1073-style unit for thick transformer color, and a tube preamp such as the Universal Audio 610…
The best microphone preamps depend on the source: choose a quiet, high-gain solid-state preamp for ribbons and clean vocals, a transformer-based unit for punch and color, or a tube preamp when you want harmonic thickness and softer transients.
Our top picks



As an Amazon Associate we earn from qualifying purchases at no extra cost to you. Ratings are shown as listed on Amazon.
Best microphone preamps by recording situation
| Recording need | Best fit | Why it works | Typical market range |
|---|---|---|---|
| One versatile channel for a home studio | Focusrite ISA One | Clean gain, input-impedance choices, DI input, and a transformer-coupled character | $500–$800 |
| Transparent vocals, acoustic guitar, and stereo work | Grace Design m101 | Low-color Class A design with plenty of clean headroom | $700–$1,000 |
| Fast, punchy drums and aggressive instruments | API 312-style preamp | Transformer tone, strong midrange presence, and simple controls | $700–$1,200 per channel |
| Classic British vocal and instrument color | Neve 1073-style preamp | Thick low mids, forward upper mids, and substantial transformer saturation | $900–$3,000 per channel |
| Warm vocal tracking and variable tube character | Universal Audio 610 MkII | Tube gain stage, variable impedance, and separate gain and level controls | $1,200–$1,700 |
| Low-budget improvement over an interface input | Single-channel solid-state external preamp | More gain control and often a larger transformer than entry-level interfaces | $150–$500 |
What matters most when choosing a preamp
Gain: especially important for ribbons and quiet dynamics
Microphone sensitivity determines how much gain you need. A typical condenser microphone may produce a healthy level with 35–50 dB of preamp gain. A dynamic microphone often needs 50–65 dB, while a passive ribbon may require 60–70 dB for quiet sources.
Do not buy on maximum gain alone. A preamp that claims 70 dB but becomes hissy near its upper limit can be less useful than a quiet unit offering 60 dB. Look for a clean gain range, a sensible output control, and enough headroom that peaks do not force the input stage into unwanted clipping.
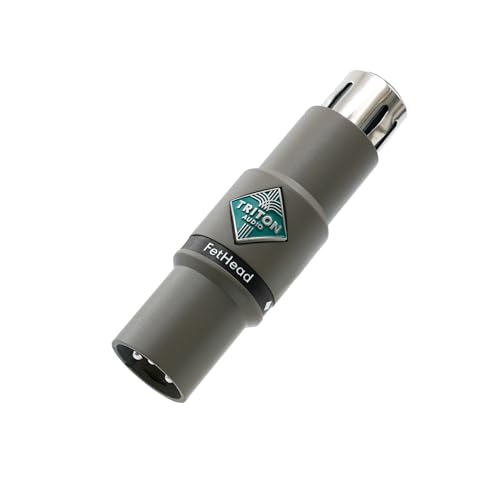
Inline boosters such as the Cloud Microphones Cloudlifter CL-1 can add gain before a microphone signal reaches a console or interface, but they are not substitutes for a complete preamp. They require phantom power and should not be placed between a ribbon microphone and an incorrectly wired or faulty phantom-power source.
Noise floor and dynamic range
A low noise floor matters most with quiet singers, distant microphone placement, intimate acoustic instruments, and ribbon microphones. A preamp with an EIN around -125 dBu or lower is generally considered very quiet, provided the measurement uses comparable conditions. Manufacturers do not always publish figures using the same bandwidth, source impedance, or weighting, so specifications should be treated as useful clues rather than a perfect ranking.
Noise is also affected by the microphone, cable, gain staging, electrical environment, and the converter after the preamp. If the interface input is already quiet, an expensive external preamp may improve tone more than it improves the noise floor.
Tube versus solid-state color
Solid-state preamps are not automatically sterile. API-style circuits can sound immediate and punchy, while Neve-style transformer circuits can add weight and midrange density. Clean Class A designs, including the Grace Design m101, aim to preserve the microphone’s character with low coloration.
Tube preamps such as the Universal Audio 610 MkII use valve gain stages that can produce harmonic saturation as the input level rises. Used conservatively, this can make a vocal feel larger and smoother. Driven harder, it can soften transients, thicken the low mids, and add audible distortion. Tube color is a creative tool, not a universal improvement: a dense arrangement may benefit from a cleaner preamp that leaves more space.
Head-to-head: the main preamp styles
Clean solid-state: accuracy and flexibility
A clean solid-state preamp is the safest choice when you record many sources and want to shape them later with plugins. The Grace Design m101 is a strong example: it offers a high-pass filter, polarity reversal, input pad, and a ribbon-friendly design without imposing a pronounced vintage EQ curve.
Choose this style for classical guitar, acoustic guitar, piano, detailed percussion, spoken voice, and vocals that already have plenty of character. It is also the most forgiving first external preamp because it does not commit every recording to a strong tonal signature.
Transformer solid-state: punch and density
API 312-style preamps are valued for fast transients and an assertive midrange. They are particularly effective on snare, kick, toms, electric guitar, bass, and vocals that need to remain audible in a busy mix. Their limited control layout is part of the appeal: set gain, check the peak level, and record.
Neve 1073-style designs provide a different kind of transformer color. They tend to emphasize weight and musical saturation, while the associated equalizer section can shape low mids and presence during tracking. A 1073-style channel is often a better choice than a completely transparent preamp when you already know you want a recognizable vintage flavor.
Tube: harmonic texture and softer transients
The Universal Audio 610 MkII offers independent gain and level controls, allowing you to drive the tube stage while keeping the converter level under control. That makes it more flexible than a simple “clean to distorted” control. Tube preamps suit lead vocals, bass DI, solo strings, and sources that need a rounder, less clinical presentation.
They can be less ideal for already-boomy voices, thick low-frequency instruments, or sessions requiring maximum transient precision. Tube units also produce more heat and eventually require tube replacement, although replacement intervals depend heavily on operating time, transport, and the individual tube.
A practical decision matrix
| Your situation | Priority | Recommended direction | Avoid |
|---|---|---|---|
| New engineer with one microphone | Versatility and easy gain staging | Clean or moderately colored single-channel preamp with pad, polarity, and high-pass filter | A highly specialized, strongly colored unit with no output control |
| Ribbon microphone and quiet source | 60–70 dB of quiet gain and suitable input loading | Low-noise solid-state preamp or a dedicated ribbon-compatible design | Using an inexpensive preamp at maximum gain without checking hiss |
| Rock vocals and close-miked drums | Transient impact and controlled saturation | API-style transformer preamp | Overly soft tube coloration on every channel |
| Warm solo vocal or bass DI | Harmonic density and variable drive | Tube preamp with separate input gain and output level | Driving the converter into clipping while chasing tube saturation |
| Small interface-based studio | Useful features per rack space | One-channel unit with DI, insert or line output, and impedance options | Buying a second preamp that adds no audible or workflow benefit |
How to set up a microphone preamp correctly
- Connect the microphone before engaging phantom power. Use phantom power only when the microphone requires it. Many modern microphones tolerate phantom power, but ribbon microphones and unusual vintage wiring require extra caution.
- Start with moderate gain and the output control low. Have the performer play or sing at the loudest expected level, then raise input gain until the preamp receives a healthy signal.
- Leave digital headroom. Aim for average peaks around -18 to -12 dBFS in the recording software, with louder peaks generally staying below about -6 dBFS. Recording close to 0 dBFS does not create a better analog tone.
- Use the high-pass filter only when it solves a problem. A setting around 70–100 Hz can reduce rumble and foot noise on vocals, but filtering too high can thin a deep voice or acoustic instrument.
- Compare at matched loudness. A louder preamp often seems more exciting. Match the levels before deciding whether the difference is tonal, noisy, or simply louder.
Ownership realities and common mistakes
External preamps are usually durable, but switches, potentiometers, relays, tubes, and jacks are the parts most likely to need attention. Keep ventilation clear around tube equipment, avoid repeated hot plugging, and use padded cases when transporting rack units. Dust in switches can create intermittent crackle; aggressive contact cleaner can cause further damage, so servicing is preferable to repeatedly spraying controls.
The most common buying mistake is selecting a colored preamp to fix a microphone problem. A harsh microphone, poor room, or excessive distance cannot be reliably corrected by a transformer. Microphone placement and room treatment usually produce a larger improvement than moving from one competent preamp to another.
Another mistake is buying too few channels for the way you record. If you regularly track stereo acoustic guitar, drum overheads, or two vocal microphones, a matched two-channel unit may be more practical than a premium single channel. Conversely, a single excellent preamp can make sense for a lead vocal or bass DI that appears on nearly every session.
Bottom line
For the broadest range of studio sources, choose a quiet solid-state preamp with useful filters and enough gain. Choose an API-style design when punch and presence matter, a Neve 1073-style unit for thick transformer color, and a tube preamp such as the Universal Audio 610 MkII when variable harmonic warmth is part of the sound you want. The best microphone preamps are not the ones with the highest price or gain figure; they are the ones whose noise performance, headroom, and coloration match your microphone, source, and mixing goals.




Write Your Review
No reviews yet. Be the first to share your experience!